Last updated on August 24th, 2026 at 10:22 am
Table of Contents
Introduction: Pumpkin Chocolate Chip Snack Bars
Why You’ll Love These Snack Bars
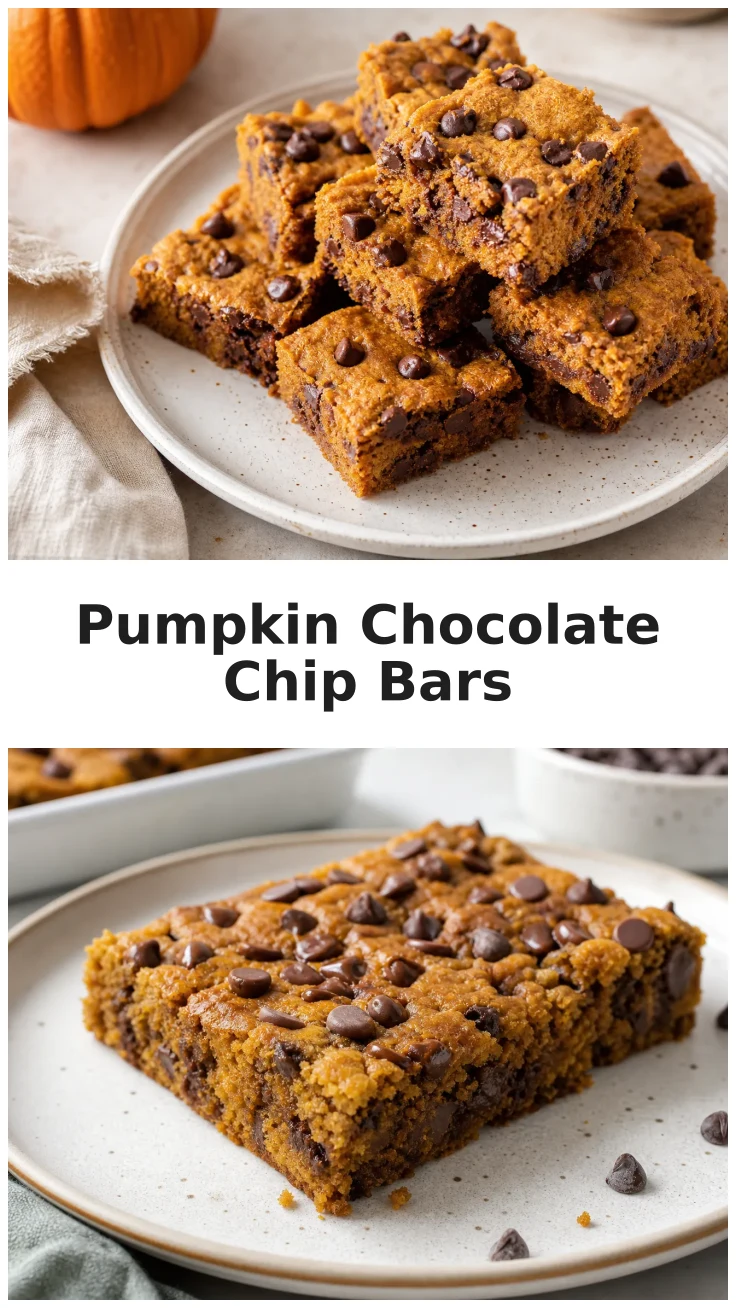
Imagine biting into a snack bar that’s perfectly fluffy, filled with the warm spices of pumpkin, and dotted with rich chocolate chips. These Pumpkin Chocolate Chip Snack Bars are everything you could dream of in a fall treat. They’re not only delicious but also incredibly easy to make, ensuring you can whip them up in a pinch whenever the craving strikes.
With autumn around the corner, these bars are the quintessential pumpkin spice snacks that suit any occasion. Whether you’re a pumpkin spice enthusiast or someone looking to dip their toes into pumpkin-flavored treats, these bars promise a delightful experience. Plus, they offer that homemade touch that you just can’t get from store-bought options.
Perfect for School Lunches and Snacks
These snack bars are an excellent addition to any lunchbox. Their moist crumb and delightful flavor make them a hit with kids and adults alike. Pack them for school lunches, picnics, or simply keep them on hand for a quick snack that satisfies the sweet tooth.
The bars are also incredibly versatile, making them suitable for any time of the day. Enjoy them with your morning coffee or as an afternoon pick-me-up. They’re not just a treat but a comforting reminder of home-cooked goodness.

Ingredients
Essential Ingredients for Moist Bars
To achieve the perfect texture and flavor in these pumpkin chocolate chip snack bars, you’ll need a selection of essential ingredients that work in harmony to deliver a moist and flavorful bite.
You’ll start with all-purpose flour, which provides the structure for the bars. Baking powder is crucial for that fluffy rise, and a blend of pumpkin puree and pumpkin spice will infuse the bars with those classic autumn flavors. Of course, the star of the show is the chocolate chips, which add a delightful sweetness and texture.
Optional Add-ins for Extra Flavor
For those looking to experiment, consider adding some chopped nuts like walnuts or pecans for a crunchy contrast. Or, sprinkle in a handful of dried cranberries for a tart twist. These optional add-ins can elevate your bars, making them uniquely yours.
For more chocolatey inspiration, check out these Double Chocolate Chip Brownies that offer a rich, indulgent treat.
Step-by-Step Instructions
Preparing the Batter
Start by preheating your oven to the perfect temperature, ensuring your bars bake evenly. In a large mixing bowl, combine your dry ingredients with precision. Then, in a separate bowl, cream together the butter and sugar until light and fluffy. Gradually add your eggs, followed by the pumpkin puree, blending until smooth.
Combine the wet and dry mixtures slowly, folding them together to create a cohesive batter. Finally, fold in the chocolate chips, ensuring they’re evenly distributed throughout the batter.
Baking to Perfection
Pour your batter into a prepared baking pan, smoothing it out to ensure an even bake. Place it in the oven and bake until the bars are golden brown and a toothpick inserted into the center comes out clean.
Once baked, allow the bars to cool in the pan for a few minutes before transferring them to a wire rack. This cooling process is crucial for maintaining their moist crumb and ensuring they’re ready to be sliced into perfect portions.
Pro Tips
To ensure your Pumpkin Chocolate Chip Snack Bars turn out perfectly every time, keep these pro tips in mind. Achieving the ideal texture and storing them properly can make all the difference.
- Use fresh baking powder for the best rise. Stale baking powder can result in flat bars.
- For a more pronounced pumpkin flavor, try using homemade pumpkin puree instead of canned.
- To prevent the chocolate chips from sinking, toss them in a bit of flour before folding them into the batter.
- Let the bars cool completely before slicing to ensure clean cuts and maintain their shape.
Remember, storing your bars correctly ensures they remain fresh and delicious. Consider using an airtight container to keep them moist. For more tips on preserving snack bar freshness, explore our Healthy Maple Pumpkin Granola Bars.
Achieving the Perfect Texture
The key to achieving the perfect texture lies in the balance between wet and dry ingredients. Too much moisture can lead to soggy bars, while too little can make them dry and crumbly. Pay close attention to the measurements and mixing process for the best results.
Storage and Shelf Life
These bars can be stored at room temperature for up to three days. For longer storage, consider refrigerating them or freezing individual portions for a quick treat on the go.
Serving Suggestions
Pairing with Beverages
These snack bars pair beautifully with a variety of beverages. Enjoy them with a hot cup of coffee for a cozy morning treat, or pair them with a glass of cold milk for a classic combination that always satisfies.
Creative Serving Ideas
For a creative twist, try serving these bars warm with a scoop of vanilla ice cream. The contrast between the warm, spicy bars and the cold, creamy ice cream is a match made in dessert heaven.
For more dessert inspiration, take a look at these Banana Pudding Cheesecake Icebox Bars, which offer a refreshing and indulgent treat.
Nutritional Information
Caloric Content and Macros
Each slice of these pumpkin chocolate chip snack bars contains approximately 320 calories, making them a satisfying treat without overindulgence. They provide a balance of carbohydrates, protein, and fats, with a delightful sweetness from the chocolate chips.
These bars offer a moderate nutritional profile that makes them suitable for a variety of diets, provided they’re enjoyed in moderation. Keep them on hand for a quick energy boost or a sweet reward after a productive day.


Pumpkin Chocolate Chip Snack Bars

Equipment
- 1 9-inch round cake pan greased and floured
- 1 Electric Mixer
- 1 Mixing Bowl large
Ingredients
Dry Ingredients
- 2 cups all-purpose flour
- 1 tsp baking powder
- 1 tsp baking soda
- 1/2 tsp salt
- 2 tsp pumpkin spice
Wet Ingredients
- 1/2 cup unsalted butter softened
- 1 cup granulated sugar
- 2 large eggs room temperature
- 1 cup pumpkin puree
- 1 tsp vanilla extract
Add-ins
- 1 cup semi-sweet chocolate chips
Instructions
Preparation
- In a large mixing bowl, combine the flour, baking powder, baking soda, salt, and pumpkin spice. Whisk together until well combined.
- In a separate bowl, use an electric mixer to cream together the softened butter and sugar until light and fluffy. Add the eggs one at a time, beating well after each addition. Mix in the pumpkin puree and vanilla extract until smooth.
- Gradually add the dry ingredients to the wet mixture, stirring gently with a spatula until just combined. Be careful not to overmix. Fold in the chocolate chips evenly throughout the batter.
- Preheat your oven to 350°F (175°C). Grease and flour a 9-inch round cake pan to prevent sticking.
- Transfer the batter into the prepared cake pan, smoothing the top with a spatula to ensure even baking.
- Place the pan in the oven and bake for approximately 50 minutes, or until a toothpick inserted into the center comes out clean.
Serving
- Allow the bars to cool in the pan for about 10 minutes before transferring them to a wire rack. Once completely cooled, slice into 8 even bars and serve.
Storage
- Store leftover bars in an airtight container at room temperature for up to three days, or refrigerate for up to a week. For longer storage, wrap individual bars in plastic wrap and freeze for up to three months.
Notes
FAQ
Can I use fresh pumpkin instead of canned pumpkin puree?
Yes, you can use fresh pumpkin instead of canned pumpkin puree. To do so, cook the pumpkin until it is soft, then puree it in a food processor until smooth. Make sure to drain any excess water from the fresh puree to ensure the correct consistency in your batter. Fresh pumpkin can enhance the flavor of your bars, providing a more natural and robust pumpkin taste.
How can I make these snack bars gluten-free?
To make these snack bars gluten-free, you can substitute the all-purpose flour with a 1:1 gluten-free baking flour. Many gluten-free flour blends are specifically designed to mimic the properties of regular flour, making them suitable for most baking recipes. Ensure that all other ingredients, such as baking powder, are gluten-free to avoid cross-contamination.
Enjoyed this recipe? Leave a review!
There are no reviews yet. Be the first one to write one.