Created on December 2nd, 2025 at 04:20 pm
A cherished classic that brings comfort and warmth
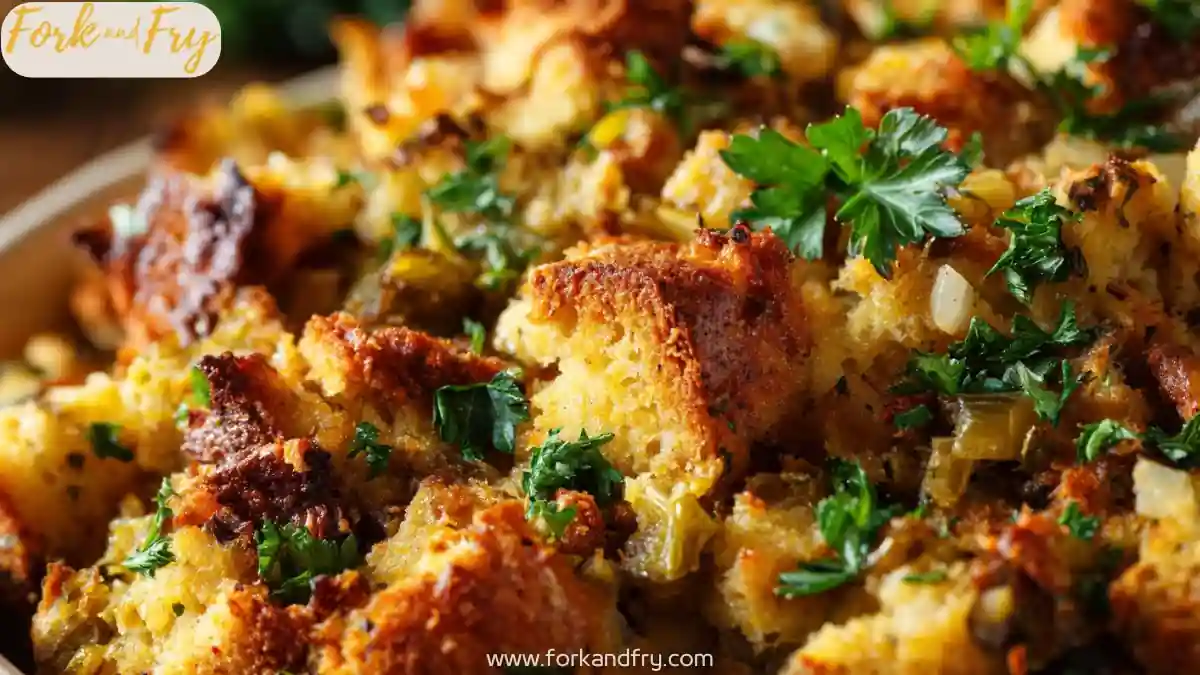
Grandma’s stuffing is more than just a side dish; it’s a flavorful embrace served at family gatherings and holiday feasts. With its blend of herbs, warm bread, and savory vegetables, this stuffing is a reminder of home and tradition. The aroma that fills the kitchen as it bakes creates a sense of nostalgia, wrapping you in warmth and comfort. Each bite offers a delightful mix of textures—the crispiness from the edges and the tenderness from the moist center.
This recipe showcases the beauty of simple ingredients working harmoniously. The addition of savory herbs and a hint of onion adds depth to the flavor, making it a cherished recipe that stands the test of time. Whether served alongside a holiday turkey or as a comforting addition to a weeknight meal, Grandma’s stuffing never fails to deliver a sense of home.

Why This Recipe Works
This stuffing is beloved for its simplicity and the deep flavors it offers. Using everyday ingredients, it transforms into something truly remarkable. The blend of toasted bread, aromatic vegetables, and fragrant herbs creates a complex harmony of flavor and texture. This dish is versatile, allowing for personal touches like adding sausage or nuts, which you can adjust based on your family’s preferences.
One of the best aspects of this stuffing is its ability to taste even better the next day. When reheated, the flavors meld beautifully, making leftovers something to look forward to. It can easily be stored and packed for lunch, adding convenience to your busy days while delivering comfort in every bite.
Time Breakdown
This stuffing comes together quickly and isn’t time-consuming, making it perfect even on busy days. With minimal active cooking and most of the time spent waiting for it to bake, you’ll find this recipe stress-free.
Prep Time: 15 minutes
Cook Time: 30 minutes
Total Time: 45 minutes
Servings: 8
Ingredients List
- 1 loaf of day-old bread, cut into cubes (about 10 cups)
- 1 medium onion, diced
- 2 celery stalks, diced
- ¼ cup unsalted butter
- 2 tsp dried sage
- 2 tsp dried thyme
- 1 tsp salt
- ½ tsp black pepper
- 2–3 cups low-sodium chicken or vegetable broth
- 2 large eggs, beaten
- Optional: ½ cup chopped fresh parsley for garnish
Kitchen Tools
This recipe uses basic kitchen tools to keep cooking easy and enjoyable. You likely already have everything you need.
- Large mixing bowl
- Baking dish (9×13 inches)
- Skillet for sautéing
- Wooden spoon for mixing
- Measuring cups and spoons
Step-by-Step Instructions
Preheat your oven to 350°F (175°C). This will ensure your stuffing bakes evenly and becomes golden brown.
In a large skillet, melt the butter over medium heat. Once melted, add the diced onion and celery. Sauté for about 5–7 minutes, until they are soft and fragrant, allowing their natural sweetness to develop.
In a large mixing bowl, combine the bread cubes, sautéed vegetables, sage, thyme, salt, and black pepper. Gently toss everything together using a wooden spoon until well mixed.
Pour in the chicken or vegetable broth slowly, mixing until the bread is adequately moistened but not soggy. You want the cubes to absorb just enough liquid without falling apart.
Stir in the beaten eggs, mixing until everything is well combined. The eggs will help bind the stuffing together, ensuring a lovely texture once baked.
Transfer the stuffing mixture into a greased baking dish, spreading it evenly. Cover with foil and bake for 25 minutes. Then, remove the foil and bake for an additional 5–10 minutes until the top is crispy and golden.
Pro Tips
- For added flavor, consider using a mix of different types of bread such as sourdough or whole wheat.
- If you like a bit of heat, add a pinch of red pepper flakes or some diced jalapeños to the veggie mix.
- Fresh herbs can be used instead of dried for a brighter flavor—just double the amount you use.
- Make ahead: You can prepare the stuffing a day in advance and refrigerate before baking, letting the flavors meld overnight.
- This stuffing is also great with the addition of cooked sausage or nuts for extra depth.
Comforting Tradition
Grandma’s stuffing is a symbol of comfort and warmth that brings families together. This dish stands out for its simplicity and rich flavors, capturing the essence of home cooking without complicated steps. Whether made for a grand holiday meal or a casual family dinner, this recipe situates itself perfectly within the comforting rotation of everyday meals.
Keep this recipe close for the days when you want something delicious without much effort. With its familiarity and satisfying taste, Grandma’s stuffing will always hold a special place at your table.
Nutrition Table
| Nutrient | Amount (per serving) |
|---|---|
| Calories | 220 kcal |
| Protein | 5 g |
| Fat | 10 g |
| Carbohydrates | 28 g |
| Fiber | 2 g |
| Sugar | 1 g |
| Sodium | 450 mg |
Disclaimer: Nutrition facts are estimated using online tools and may vary based on your ingredients and preparation. Please consult a nutritionist for precise dietary advice.
Grandma’s Stuffing
Ingredients
Main Ingredients
- 1 loaf loaf of day-old bread, cut into cubes (about 10 cups)
- 1 medium onion, diced
- 2 stalks celery, diced
- ¼ cup unsalted butter
- 2 tsp dried sage
- 2 tsp dried thyme
- 1 tsp salt
- ½ tsp black pepper
- 2–3 cups low-sodium chicken or vegetable broth
- 2 large eggs, beaten
- ½ cup chopped fresh parsley (optional for garnish)
Instructions
Preparation
- Preheat your oven to 350°F (175°C).
- In a large skillet, melt the butter over medium heat. Add the diced onion and celery, sautéing for 5–7 minutes until soft and fragrant.
- In a large mixing bowl, combine the bread cubes, sautéed vegetables, sage, thyme, salt, and black pepper. Toss together until well mixed.
- Pour in the chicken or vegetable broth slowly, mixing until the bread is moistened but not soggy.
- Stir in the beaten eggs until well combined.
- Transfer the mixture to a greased baking dish, spreading it evenly. Cover with foil and bake for 25 minutes. Remove the foil and bake for an additional 5–10 minutes until the top is crispy and golden.
Notes
Enjoyed this recipe? Leave a review!
There are no reviews yet. Be the first one to write one.